Here’s the simple guide to use WPX Hosting Staging Area, One of the cool features available on WPX Hosting.
I you still didn’t tried wpx host, dont wait anymore try it now.
How To Create A Staging Environment For WordPress Sites -WPX
What is Staging Area?
A staging area (otherwise staging point, staging base or staging post) is a location where organisms, people, vehicles, equipment or material are assembled before use. If you would like a development version of your live website to test out or fine tune themes/templates, plugins, layouts etc, you can do so on WPX Hosting with the Staging Area function.
WPX Hosting Staging area
In other hosting companies, Staging area does not Allow Test Version to merge with your Active site. But WPX Hosting Staging area allows to merge Test site and Active site in single click. Below checkout how to use WPX Hosting Staging area and merge it.
Note:
Each staging area takes 1 website slot.
For eg,
if you have 5 website plan, and 2 active wordpress installations. If you create staging area for that 2 sites then another 2 website slots will be used(totally 4 will be used) and You left 1 free for installations.
- 2 for existing Active websites
- 2 for Test websites [staging area]
Simple Steps to Create WPX Hosting Staging area
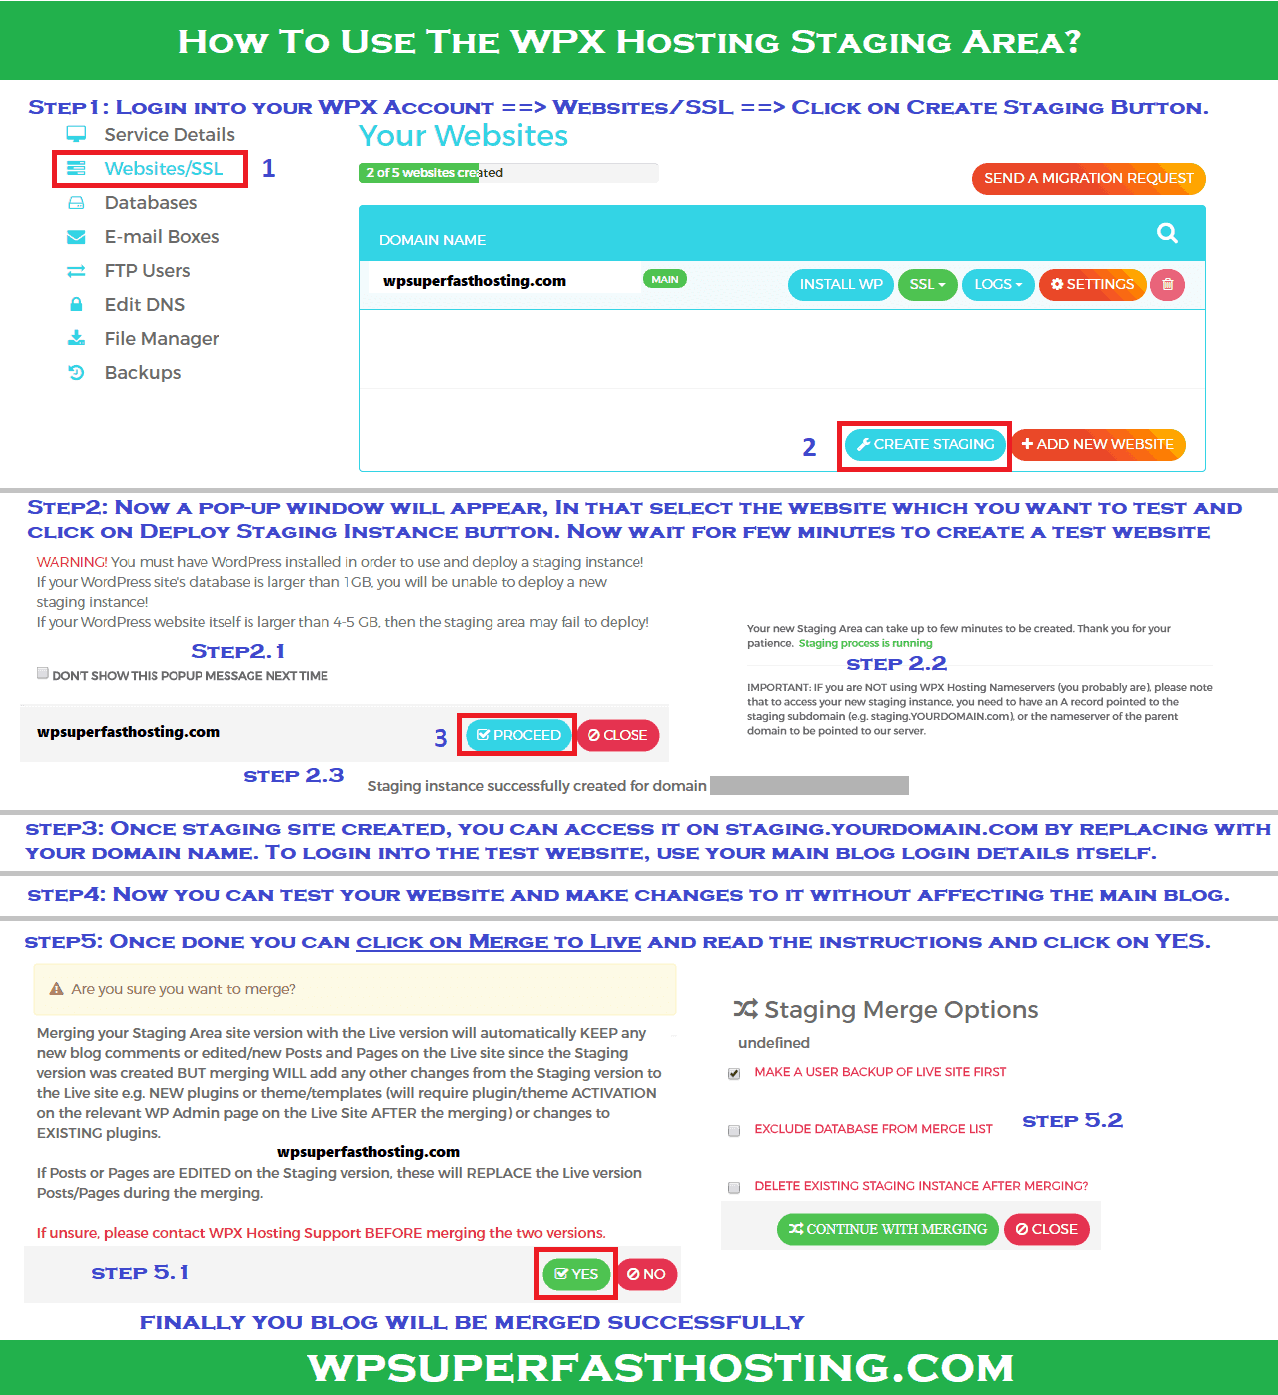
#1. Login into your WPX Account ==> Websites/SSL ==> Click on Create Staging Button.
#2. Now a pop-up window will appear, In that select the website which you want to test and click on Deploy Staging Instance button. Now wait for few minutes to create a test website.
#3. Once staging site created, you can access it on staging.yourdomain.com by replacing with your domain name. To login into the test website, use your original login details itself.
#4. Now you can test your website and make changes to it without affecting the original blog.
#5. Once done you can click on Merge to Live button and read the instructions and click on YES.
Merging your Staging version with the Live version will automatically keep any new blog content (including comments and posts) on the Live site however, merging will add any other changes from the Staging version to the Live site (new plugins, theme/templates, or changes to existing plugins).
ALERT: If Posts or Pages are edited on the Staging version, these will replace the Live version Posts/Pages during the merging.
Important: New plugins or theme/templates added to the Staging site prior to merging will now require plugin/theme activation on the relevant WP Admin page on the Live Site.
#6. You can also take backup of live site (highly recommended) before merging in order to avoid conflicts. Once all things over, Now you can see the Live website.
Note: If you didn’t see new changes make sure you clear your browser cookies.
WPX Hosting Staging Area Guide [Infographics]