Install Free SSL Certificates on WPX Hosting – WPX Hosting Offers Free Unlimited SSL Certificates for their customers, Yes, No doubt they are all UNLIMITED FREE GOOGLE-SPONSORED SSL CERTIFICATES Only.
HTTPS is one of the Recommended search engine ranking factor to Boost Your Rankings. So We Recommend every one’s WordPress Blog To Migrate from HTTP to HTTPS ASAP…
Here we provide the complete tutorial to Install Free SSL Certificate on WPXHosting to Move HTTP WordPress Site to HTTPS Version easily under WITHIN UNDER 10 SECONDS.
Why Choose Free WPX Hosting SSL’s?
You might wonder why to use free SSL’s provided by wpxhost,
- You don’t need to Waste your time in Installing single SSL.
- No Need of Paying $$ for SSL.
- No, wasting of time in filling CSRs forms
- By opting this method it’s FULLY AUTOMATED Installation and Renewals.
Free SSL Installation In Seconds (No Forms To Fill In): WPX Hosting Video Walk through
How to enable HTTPS on your WordPress blog hosted on WPX?
#1 – Login into Your WPX Hosting Profile and Navigate to My Services > WordPress Hosting to Manage all sites on your account, Make sure you have INSTALLED WORDPRESS ON WPX HOSTING.

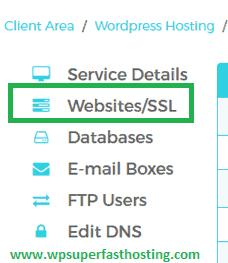
#2 – Now in Right side menu Select “Website/SSL” option
#3 – And Now Click on “SSL” and Choose “Enable” as shown in below image.

#4 – Now a small popup will appear that SSL certification is enabled for your domain, close the popup.
#5 – Now padlock (????) symbol will appear, that means SSL has been enabled next is to install the certificate.
#6 – Again Click on “SSL” and Choose “Install FREE certificate” as soon as you click another popup will appear.
#7 – Now Check on “REDIRECT ALL NON-SSL REQUESTS” and click on “INSTALL” and Choose “YES” to conform.
The SSL is now installed successfully and if go to blog it will automatically load https:// version of our domain, this means SSL shows is now active.
#8 – Finally, Install free Really Simple SSL plugin(Download Here) to 301 redirects from your non-SSL URLs to the SSL version + the www SSL version work perfectly.
NOTE: If you are using CloudFlare on your domain, the SSL option in your CloudFlare account should be selected to”Full(Strict)”!
Hope finally you like our Guide How To Install Free SSL Certificates on WPX Hosting. Share this guide with others also. PHP 7.x available on WPXHosting Now.